Low friction, low cost blogging system
How to build a low-friction, low-cost blogging system with NextJS, Notion & MailerLite
I have always been a fan of building my own things. That journey started all the way in 2015, that’s already 10 years ago since the beginning of my design journey. I went through a Web designer, UX designer, Product designer, Digital producer, Software designer, in agencies, product companies, freelance jobs and outsourcing agencies. But my core values haven’t changed that much.
- Be curious and try to understand technology
- Communicate with every means necessary
On the other side of my curiosity, I have always been fascinated by the visuals arts, so photography became my main way to explore creativity. So as time was passing by and I was getting deeper and deeper in both areas, at some point they hit a collision, and a simple idea was born:
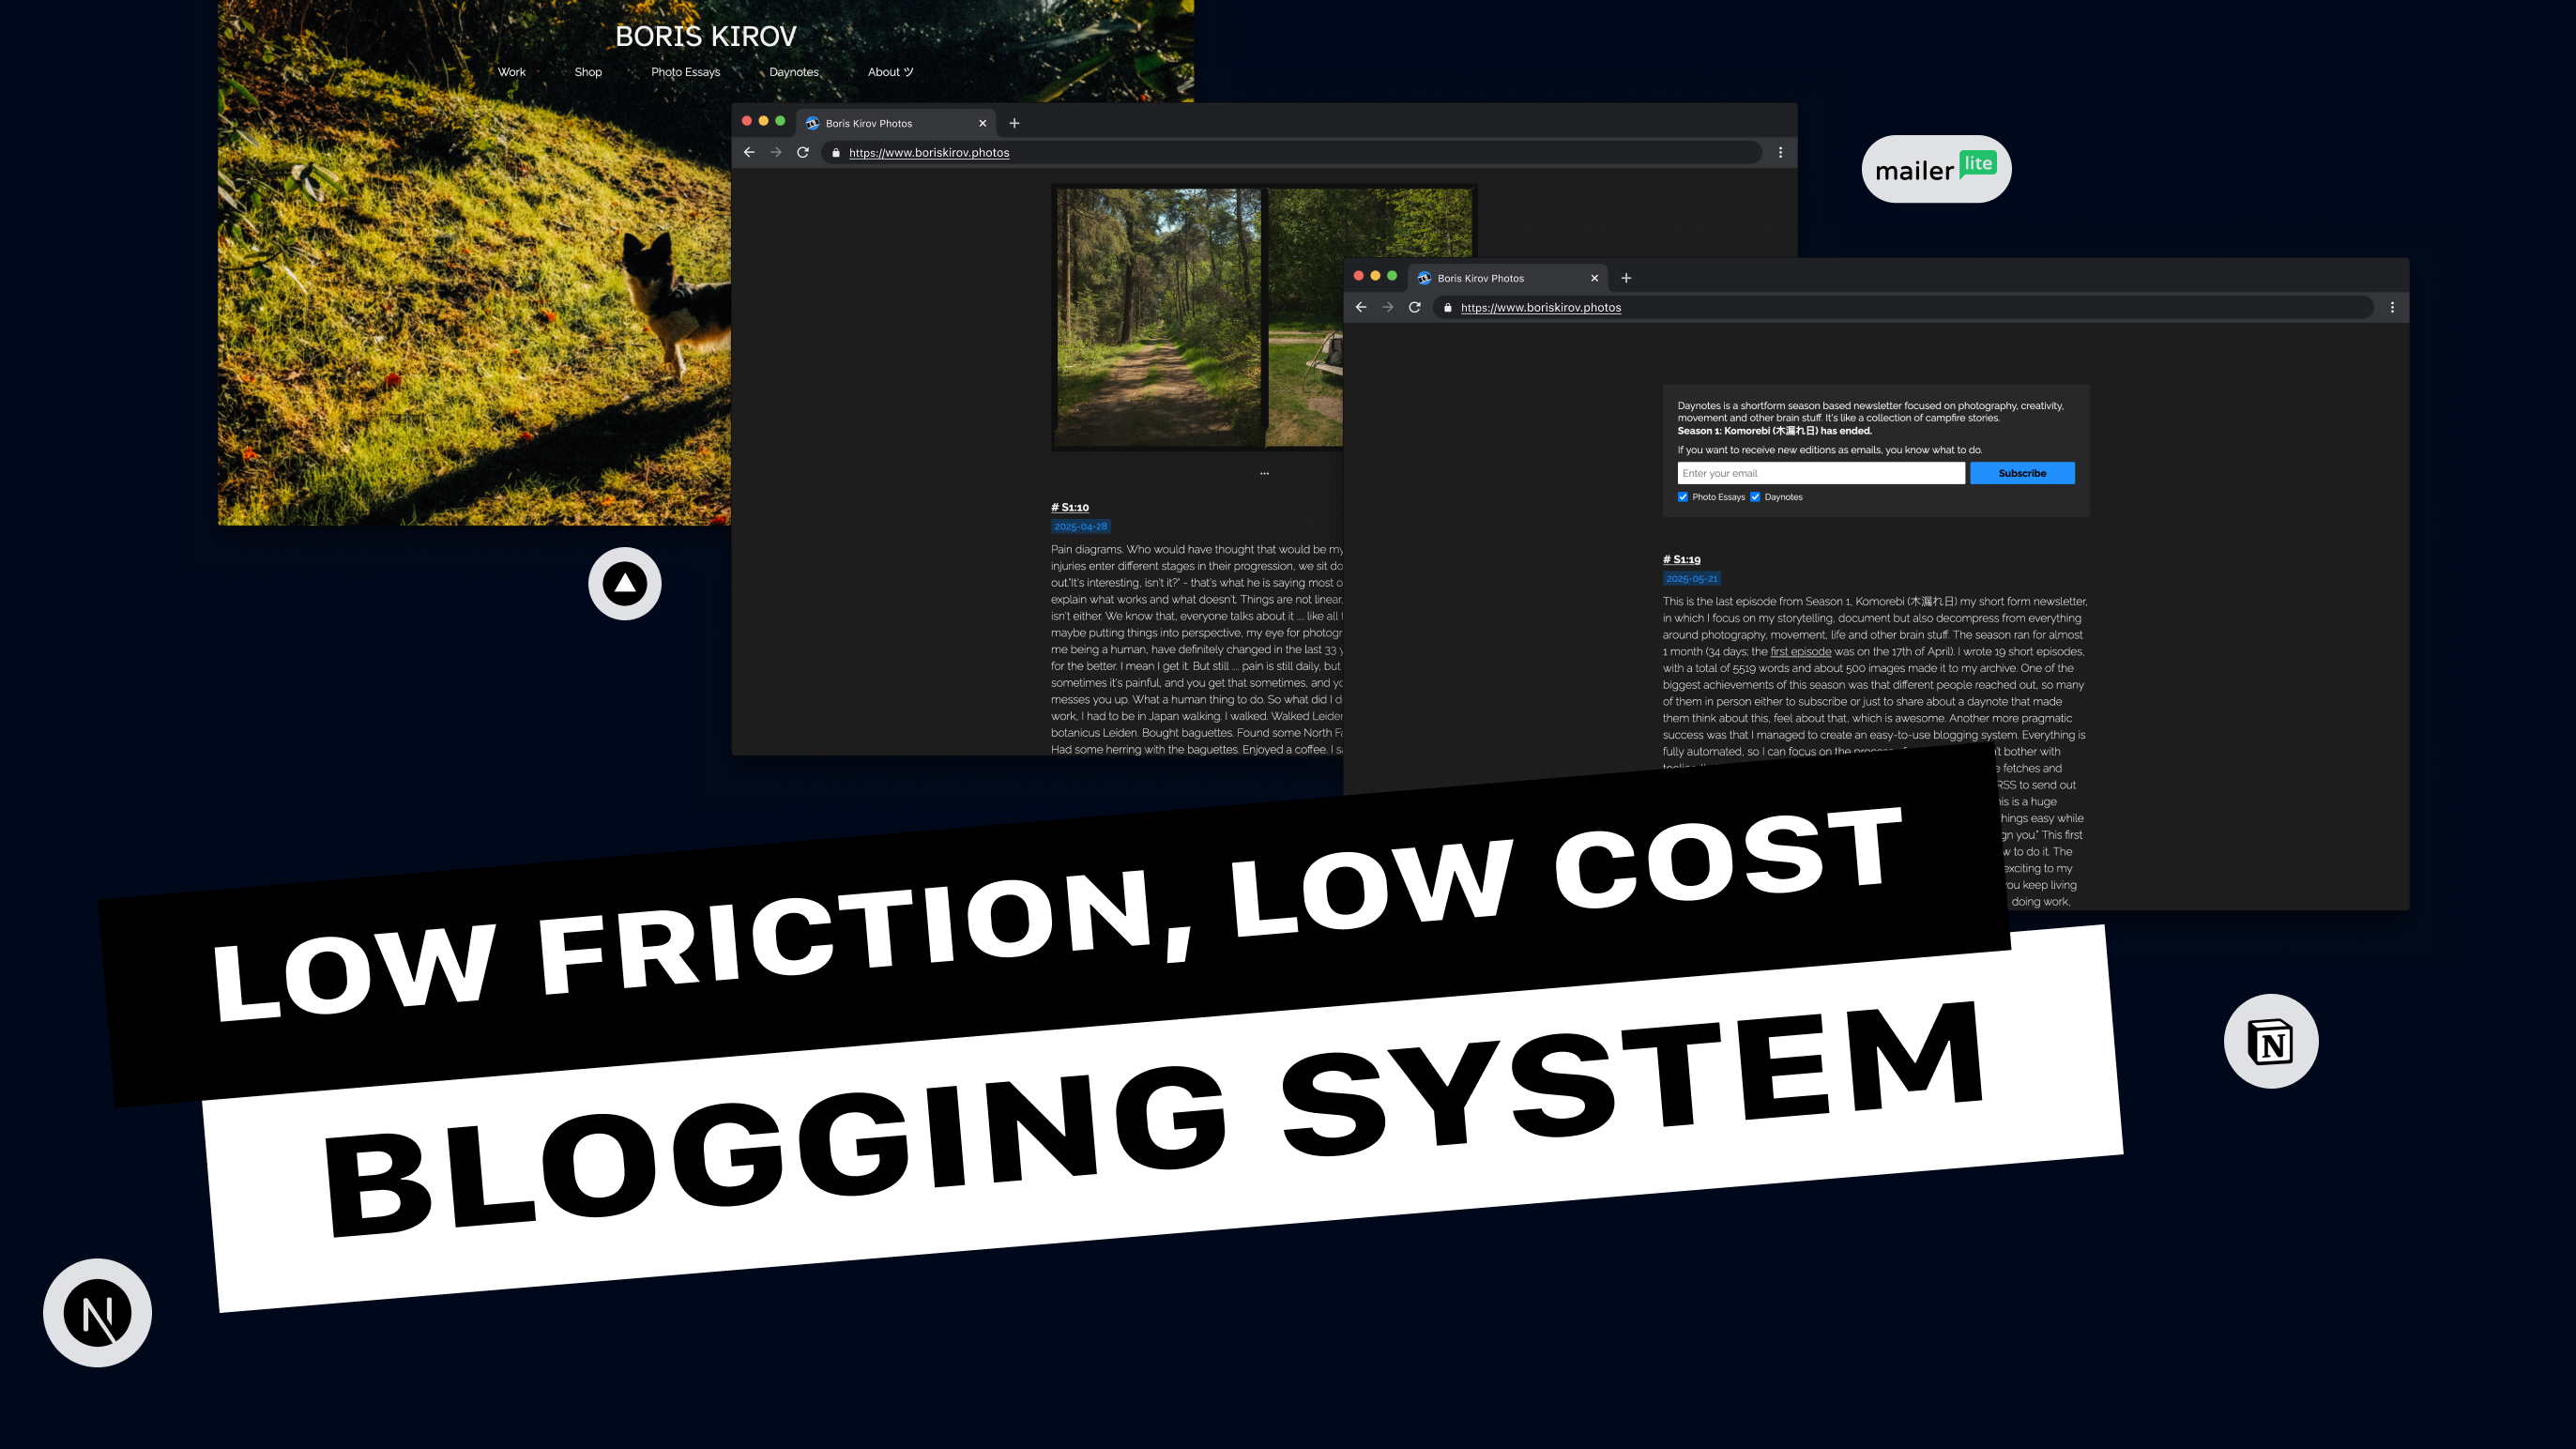
”I should build a photoblog newsletter!”
In this case study I will share most of the methods, technology, and tools I used to make this happen. This is a web app with a simple, low-cost, low-friction blogging system that allows you to create things on the go. Once you built that, you will not be bothered by constant blocks and constraints, but you will be able to explore you creativity even more, at least that's what’s happening to me. On the other hand you will gain better understanding:
- how to applications work
- how to create a simple database
- connect different tools together, and automate your process
Such a system can be a great way to build your own portfolio too, or a simple feed or blog too. There are many ways of how you can utilize such knowledge, so let’s dive into it.
Let’s talk components
There are 4 main pillars, of your system. And knowing them, how they work and why they are important would allow you to ask better questions:
- User facing - the frontend, the part which your visitors will experience
- Content- where and how to store your content, how to create new one without redeploying
- Infrastructure - that’s the backbone of your system, we talk about hosting, deploying, building, domain management etc
- Distribution: as we want to have a full newsletter experience, we should also cover the distribution, and how to connect it with your website
Let’s start to break each component down, with some examples. Don’t expect a full-blown walk though, knowledge is required to be able to do all steps, but hopefully you will know how to search or ask more effectively:
User facing side
I’m using NextJS framework to develop my website. They have a pretty simple quick start setup, so you can run a local environment and start changing content on it. You need to care about few things and start digging deeper to understand how to develop a simple web application like this one:
-
Project structure and file and folder organization (link)
- Top level folders
- Top level files
- Routing
- Metadata conventions
-
Information architecture and visual design
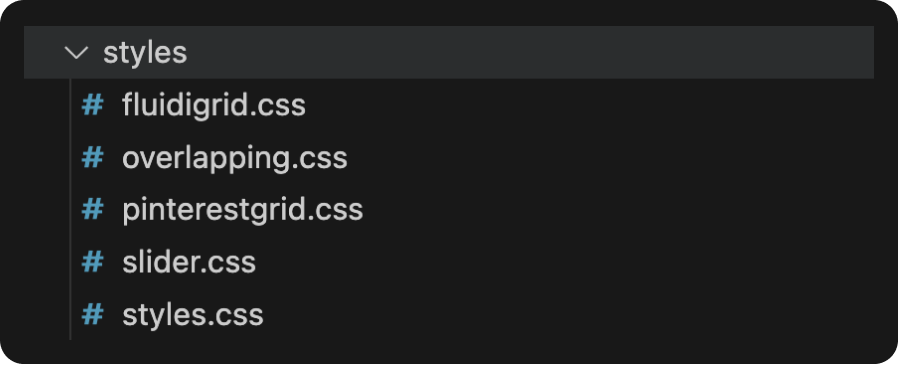
- CSS styling, and whichever way you feel comfortable designing things, I personally use the Global CSS way, but I also split my styling in multiple files so I can have a better structure, instead of a massive CSS file
- Few years ago I developed a simple grid system called Fluidigrid, which I use quickly to develop layouts, but you can always use something else, it was for my own personal convenience
For the creation of such a project, there was no need to use Figma, or other tools, but if you want to can create a mockup beforehand.
Content side
I knew I wanted to have a newsletter blog, but I had to think more about the conditions under which I would build such a thing. We don't want overcomplicated projects for no reason. So the conditions are:
- Easy setup
- Easy maintenance
- Low cost
- Easy to use
You see I was on the easy/low side of things, in order to start doing things. There is that saying:
“Environment is the invisible hand that shapes human behaviour.” — James Clear, Atomic Habits
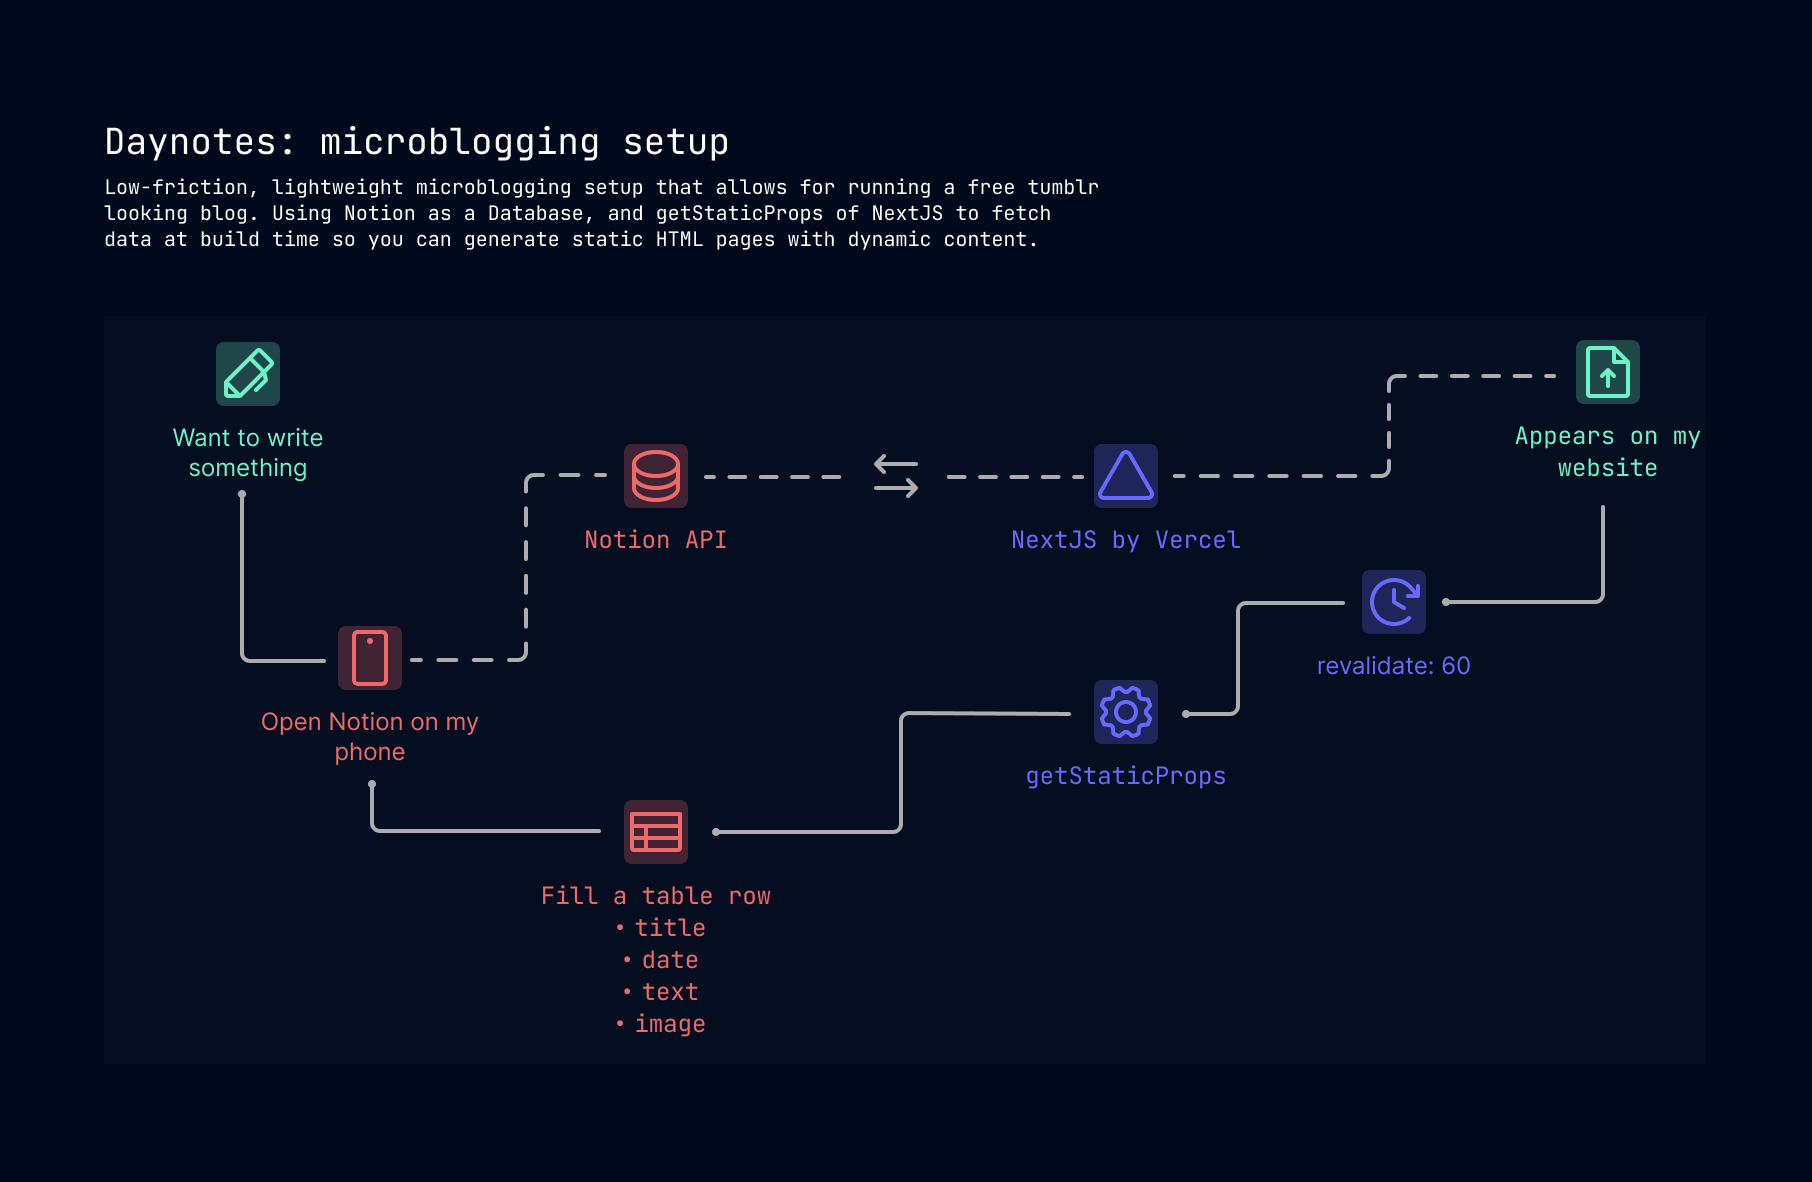
I wanted to be able to write posts on the fly on my phone, and not be bound by seeking for a quiet and calm place. But if I wanted to so that, I wanted to be able to. Notion is famous versatile knowledge management system, that keeps evolving. And using it as database and as a place to create from my phone for example sounded like the perfect fit. What you need to create a Notion database:
- an integration
- a workspace, with а sharable document
- table with the fields you want to access, in my case I wanted to have two types of newsletters, so I made different tables with different database properties
There are many videos to explain how to connect your NextJS with a Notion database, so we won’t go into a tutorial here.

In my case I have a Daynotes document with pages inside. Every page is a new entry. Every entry is composed of different field properties, like date, text, image and post number.
Every time I create a new entry, with provided properties it will appear on my website. No need to redeploy or do anything on a code level. There is only one simple trick to add from technical standpoint point. There is a small nextjs property, that allows your web app to refetch all content after refresh. I used that to show all new content. It’s called revalidate.
Backbone infrastructure
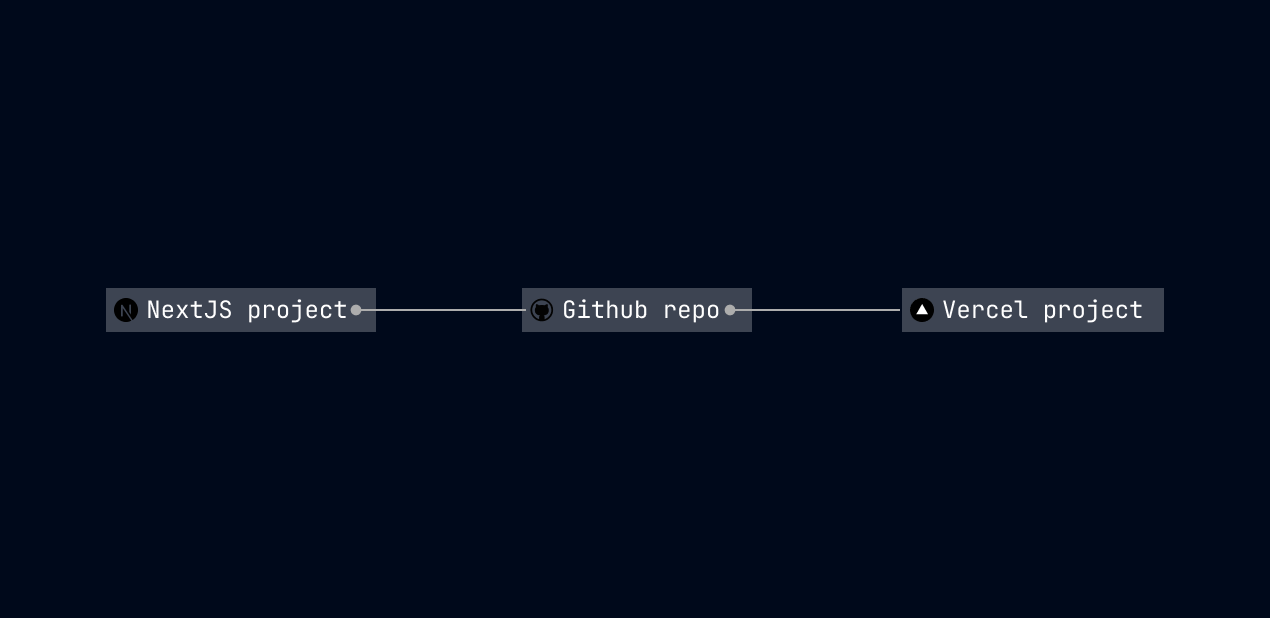
Where does the code live? How do you add custom domains? How do you deploy a new version? There are many ways of how you can achieve all that. Here is my setup:
I’ve been using NextJS for a long time now, along with Github to version control my code. It came from the need to understand 10 years ago, how engineers keep the code tidy, how do they collaborate, review and work on projects. So I started doing all those things on my own. When you use NextJS, it’s always a good idea to go with Vercel to deploy your app on the world wide web. When you connect your Github project with Vercel, Vercel starts to watch over the repo, and everytime you push new changes, it rebuilds and creates a new instance.
Now let’s talk domains. My domain is https://www.boriskirov.photos. But it can be anything you want.
- You need a domain registrar. There are plenty of companies out there. Big names are GoDaddy, Namecheap, 123domains and others.
- Connect your Vercel deployment with your private domain. You will be using DNS ( Domain Name System) you can think of this simply said as the phone book of the internet. Basically what’s going on under the hood is a translation. You are using DNS to translate the human www.boriskirov.photos into machine-readable IP addresses (e.g. 76.76.21.21). There will be different record types which you need to add in your domain registrar to allow every time when someone enters your domain name to get directed to your latest Vercel deployed github code version.
Distribute
The final step of the process was to use a mailing system, here are the questions I was asking:
- automated generation of content
- Connected flow, from blog to mailing system
- Embedded subscription model
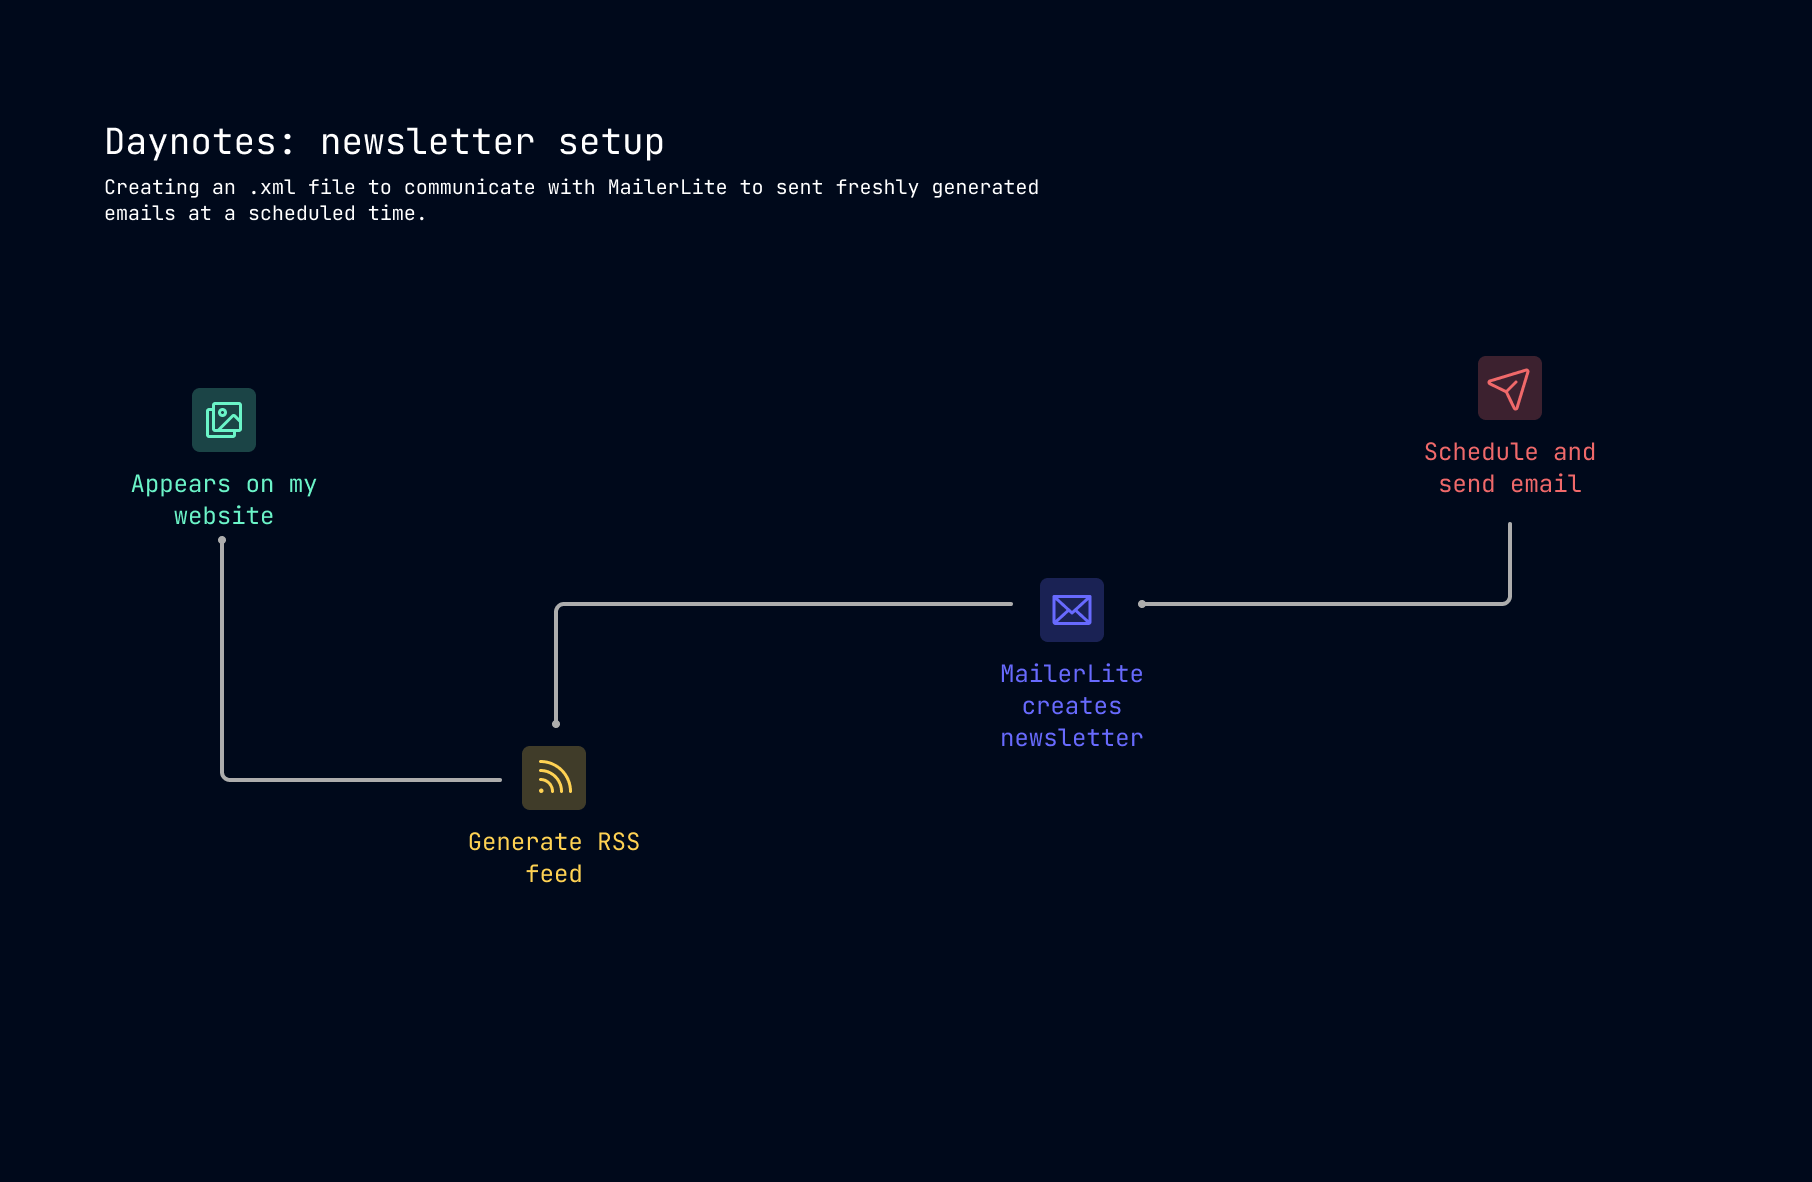
I’m running a newsletter blog around photography, creativity, movements and other brain stuff. I always wanted to allow for people to subscribe and receive updates when I create a new entry. And by staying for enough time in the world of tech, and understanding how systems work, I knew how to build such an architecture. Its pretty simple:
- I create an entry in Notion, I generate a new RSS xml file
- MailerLite the system I decided to use, is listening for new entries of the xml feel to create an email
- MailerLite RSS campaign waits for a new entry, combined with a template to generate and send out the email, for example for my Daynotes, I send the email on the next day at 06:00AM CET
Really Simple Syndication
Let's talk RSS generation as a core component of the distribution flow. RSS stands for Really Simple Syndication. That is essentially allowing a way to distribute your content. It can be through systems like Mailerlite, or for apps like Feedly etc to subscribe and start receiving updates. How I deal with that situation, well there is a simple script that's running in my codebase that generates an XML file on my content.
Second part is the distribution system. Mailerlite is super friendly and easy to work with. You can:
- Set an RSS campaign linking it through your xml feed file, in my case: www.boriskirov.photos/daynotes-feed.xml
- Configure it the way you want to, like working on new entires only. Your subscribers conditions, time and day to distribute.
- Create a visual template, you can work with the many already made templates and go from there. Or of course start from scratch.
- Download the mobile app, and follow your progress
Side tip
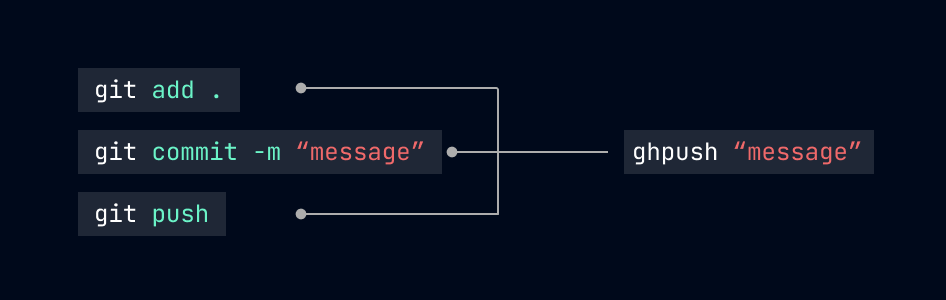
In order to speed up and automate my process even more, I’m using an alias on my .zshrc shell setup, to skip the three commands I need to execute everytime I want to publish new version of my website. As this is a project I work on my own, I often make small quick adjustments, or implement ideas out of the blue, there is no need to do reviews and be that careful. Embracing fast prototyping close to final version allows me to constantly improve and create new versions of my systems.
Final thoughts
And your system for creativity is ready. You have all the tools you need to keep doing the thing you do, no gimmicks and no distractions from your tech stack. On the other hand you might learn a ton of new cool things. Hope that was both useful, interesting and a little new. Feel free to subscribe to my newsletter of course, and enjoy some occasional emails your way.
P.S. MailerLite is an email marketing platform for small businesses, creators, and ecommerce brands, used to automate the customer journey and grow a customer list. They are super cool with an awesome team, and also support my newsletters. If you want to learn more and start using them, here is the link.